Thursday, April 28, 2005

New Frame Diagram

As promised, here is a diagram showing the damage to the frame. The near end of the frame bars are painted brown, while the front end (which is further away in the diagram) is grey. The remnant of the cross bars are red (although in real life, these are just rust colored). There are two things I can't figure out how to show in the picture quite yet--that's the wall of the trailer and the bellypan. You'll just have to imagine it running behind the red fragments.

Red area shows where the last bits of the cross member remained
Rahx wrote in that he couldn't quite make out what I was showing in yesterday's posting. I think the issue may have concerned the photo showing where I had cut at the frame. Pretty much, I cut the remnants of the red bits (on the left side). However, there is still a bit of a stub of the old cross bar left, which I will remove later.

Project Record: Replace the Teardrop Lights

Difficulty (scale of 10 drills): Image hosted by Photobucket.comImage hosted by Photobucket.com

Materials used:
Screwdriver
2 Pairs needle nosed plyers (for fishing out wire)
Plastic scraper
A few electrical caps (blue, to replace damaged ones)
Spray cleaner/degreaser
Paper towels
Galvanized screws or Olympic rivets (#10 x 1/2" pan head slotted zinc, 3 per light)
Vulcem caulk and caulking gun
Replacement teardrop lights (available at airstream dreams)

Steps

The old Bargemen lights often have a dull lens, have broken cauk seals and are constructed from a rustable steel body, making them good candidates for replacement
1. Unscrew old lights. Carefully pull the wiring and cap out of the trailer shell, fishing for any that go astray. Note that one light will only have one wire--the lights are wired in a chain and this is the last light.


From the looks of the wiring, it appears that the old Bargeman lights were from a much older stock supply than my 1961 trailer

2. Strip clean a half inch of wiring from the new lights. Match up the new lights to the old, making sure that you replace old lights with the same colored new ones.
3. Unscrew the old wiring, checking the cap to identify if it is clean and can be reused. Twist the wiring from the new light with the wiring from the trailer. Cover it with an electrical cap and screw it together tightly.

New light connected

4. Take the plastic scraper and use it to remove the old vulcem remaining on the surface of the trailer. Wash the area with cleaner/degreaser and wipe dry.


Remove the old cault and clean the aluminum surface

5. Apply a thick bead of Vulcem caulk to the circular depression on the back side of the new lights.
6. Reposition the lights on the trailer and replace the screws. Caulk will seep out and you will find gaps between the trailer and light. Some of the gaps can be minimized by pressing to bend the aluminum edges of the lights closer to the trailer. Wipe off the excess Vulkem and allow the remaining caulk to cure.

New light installed


7. Wrap remaining Vulkem in foil and store in the freezer. Defrost it a full hour before the next task.
8. After the caulk fully cures, fill in the remaining gaps with more Vulcem (apparently, using a turkey basting syringe comes in handy here). Also, carefully remove the screws one by one (try not to disturb the seal), adding Vulkem to the hole before replacing each screw or applying an Olympic Rivet. FWIW, I plan to do this step next weekend.

Stand back, crack open a cold one and admire your work!

I found that the new lights do not completely fill in the profile of the old lights. This leaves a trace of rust on the trailer surface. Folks embarking on polish jobs may wish to incorporate light replacement into their polishing project, buffing out the rust and replacing lights as they go. For us, we are doing this to stop water leaks (and I did find that two lights leaked). We plan to clean up the rust later on when we take on polishing.

Wednesday, April 27, 2005

Up to My Own Mischief

Had the day off work, so made it a work day!

Slept in late and headed down to Home Depot for a couple of last minute supplies. Spent a bit of time trying to find the local Zolatone dealer, but couldn't find it in the industrial park. So, got home, gathered up my tools and got cracking.

My first effort was to cut off the remaining rusted portion of the frame member on one side. I did it with my Dremel tool (yet another thing you can do with a Dremel!!!). It took a long time, got the motor a bit warm, wore out a cutting wheel, but I really liked the result. The cut was extremely clean--and the Dremel was much easier to control than I expected. However, Rick doesn't feel the cut was sufficiently flush enough, so I may have to try over again. Oh, well, I'll deal with that this weekend.

Shot of where I cut the rusted end off the frame
I also tried to clean up the rust left there, but it's a struggle. I can't get the wire wheel (on my drill) down there. I may be able to reach with the dremel's wire wheel, but I wanted to let the motor get completely cold first. So, I spent about a half hour with a wire brush, then gave up.

Then I turned my attention to the flooring. Now that we've started working on the front, we are wondering what is underneath all the rest of the floor. Once again, I pulled up the carpet to look at the tiles underneath. Then I removed all the tiles not held down by pieces of furniture. Most of the tiles pretty much popped off when I set the pry bar to them. Three and a half tiles were not so cooperative.

The old epoxy repair is the yellowish mass at the top right, near the wall
These tiles were apparently reapplied at a later date with lots of thick, sticky adhesive. These were murder to remove and took a heat gun, hammer and chisel. I had a hard time holding everything, especially with the rubber gloves that were necessary because of the adhesive. Sometimes the tiles melted before the adhesive. Finally after about 30 minutes effort, they came up...and I found a nasty lumpy epoxy and fibercloth repair! Yuck.

I also made one other unpleasant discovery...as I moved towards the back, I became aware that the subflooring had odors that you couldn't notice standing up. Bad news.

Demo efforts continue

So, when the going gets tough, the tough return to Home Depot!

This time, I did find the Zolatone dealer on the way--and was informed nicely, but firmly that they didn't sell paint except to contractors. Phooey. I'm not sure I'm taking that so easily...I'm the daughter of a builder and my Daddy taught me that there is one golden rule in the trade whenever you reach an impasse: get creative!

Continued on to Home Depot, got a handful of supplies, stopped for sushi, meditated on entering the contracting business, rolled my eyes and went home.

My last project of the day was replacing the teardrop lights on the trailer. This was an awesome project--one I highly recommend, since it takes little in the way of tools, requires little skill, but the results are fantastic.

Overall, I feel I used today productively, but can't stop wondering how much more we're still needing to do with this floor.

Tuesday, April 26, 2005

Workday Musings

I just realized that the photo from the inside makes it look like our hitch is also separated from the frame! It really isn't--last summer I cleaned up the outside steel and painted it silver. Inside the trailer, however, the frame is painted black. The only thing that is missing is the crossbar and plate at the front. I'll try to insert a diagram of the situation here later.

Fortunately, it's a relatively easy fix. The spot is easily accessible, both from inside the trailer and from outside (by lifting up the bellypan, which now is disconnected).

Last night Rick spent time cleaning things up. Meanwhile, I wasted lots of time trying to find my wire wheel attachment for the drill. I really need to reorganize my supplies, which are now dumped into several plastic tubs.

The last thing I did was start my effort to restore the worn Airstream registration plaque next to the door. For this effort, I am testing out using liquid latex masking fluid (aka Frisket) to block out places I don't want to paint. I started applying it over the etched lettering, right up until it got too dark to work. I am using a very fine brush, but it is still a bit too clumpy to handle the really fine lines--places like the image of the bicyclist and the trailer. I think I am going to end up canabalizing another paintbrush to see if I can cut the bristles down to a finer point. Hopefully this, plus a steady hand, will cover all the image, so I can spray a light layer paint over the rest of the sign and get a good representation of the sign's original appearance.

Ordered a bundleload of supplies from Airstream Dreams. That included breaking down for the very pricey rivet shaver, which thankfully is on sale at this point. Now I have to get some more items to work on windows.

Meanwhile, I also recieved a package in the mail--a vintage WBCCI blue beret that I won last week on ebay. I saw one of these two weeks ago at the Cherry Blossom Rally and fell in love with it. Luckily, the old ones appear to be readily available from vintage clothing dealers. This old one is made from a real French wool beret (I know, because it came in its original packaging) and smacks of that oldtime "ooh la la" look! Newer WBCCI berets are made from military surplus style berets, which, I hate to say, lack a bit of style (especially when they are worn flat on the head like mushroom caps). This old one-c'est superbe! I will be strutting in style when I wear this one down low on my head like an old school beatnik!

Tommorrow I have the day off from work, so I'm probably going to get cracking on the trailer.

Sunday, April 24, 2005

The Demolition Effort Continues

Well, today Rick continued cutting up to the end of the wood. This came about as a result of drilling, chiselling, sawing and plain brute force. Midway through, I pitched in and we both worked at cutting--or breaking--the bolts going from the frame, through the floor and the "U" channel (a piece of bent aluminum providing an airspace between the inner and outer shells). That released, Rick lifted up the "U" channel, drilled out the front rivets--and the rusted front plate just fell away! I suppose that's one thing we're going to have to replace!


Interior view with the rusted front frame plate removed

Front plate

View from the outside--Rick removed the old battery box and drilled out the rivets holding the front plate and the forward lip of the bellypan

Damage Assessment

Yesterday's photos don't really show where we see the front end damage. The following diagram shows my own observation of what appears to be damaged (all pictures can be double clicked to view them larger).


Saturday, April 23, 2005

Can't Turn Back

Today we did it. We went into the "can't turn back territory," we cut into the trailer.

This morning, we took turns drilling out the rivets holding the inside shell in place in the back. Removing it involved unriveting all of the window trim and rivets to adjoining pieces. The next pieces of aluminum overlapped the back one, but we were able to remove the section by lifting it out. The only complication was that there were several rivets layered under the overlapping pieces. I had to pull those sheets out while Rick drilled out the rivets. The whole experience made me very aware of how much slower I was at the drilling that Rick, who frequently does similar work when he diassembles control racks at the plant.

Once we had it all down, Rick started cutting a hole in the subfloor. He started small, then we looked in with flashlights to see what was ahead of us. Then, after a quick call to Stuart Natof, he measured off a space between the two diagonal frame members and enlarged it with the jigsaw.


Full view of the opening

What did we find? First, our flooring is much more solid than we thought. Most of it is in good shape, except for the portion to the left side. The front of the frame, however, is clearly rusting badly, probably as a result of the battery leak.


View of damage (left side)

After reading online about many tales of gross discoveries in the bellypan, I was happy that we revealed nothing particularly horrible, just small piles of rust and sawdust.

Another odd note--in the middle of our efforts, a violent thunderstorm hit. Somehow, a tiny bit of the rain leaked up into the bellypan. We're not sure how that happenened, but maybe we'll figure it out as we go. There's going to be more effort to get at this, but so far, so good.

Thursday, April 21, 2005

Rip Er Out!


Before we ripped it apart...
I'm on a post work high. We tore into the trailer! The kids (visiting nephews who flirted with the idea of camping out there) are gone and we have started work!

We're not quite sure quite what we face yet, but at least the gaucho is out. It was all screws, but some of them were very difficult to remove without stripping. With two of us, it took two hours! It ended up being truly a joint effort--Rick is better at handling the really tightly adhered ones, my smaller hands were better for getting the ones in tight places. Two were set underneath another board that was stapled in place. Rick was able to push it aside and I managed to loosen the screws.

Not bad for a post-work effort. Rick wants to start planning these--though I wonder how we'll fit in many of these kinds of sessions (with both of us working) with his school schedule (Rick is finishing up his college degree after work hours). Maybe it will be easier in the summer session...


The first screws come out.

Wednesday, April 20, 2005

The Zen of Airstream Repair

As previously mentioned, Rick and I became aware of gradually feeling less and less confident in our trailer. By last summer, we were convinced something was not quite right, but we couldn’t quite put our finger on it. After showing the rusted spots we found, we were told not to worry. Deep down, we knew this wasn’t quite right. Increasingly, we found it harder to rationalize when to take the trailer on the road. By Cherry Blossom Rally time, I was determined to get a better sense of what was up.

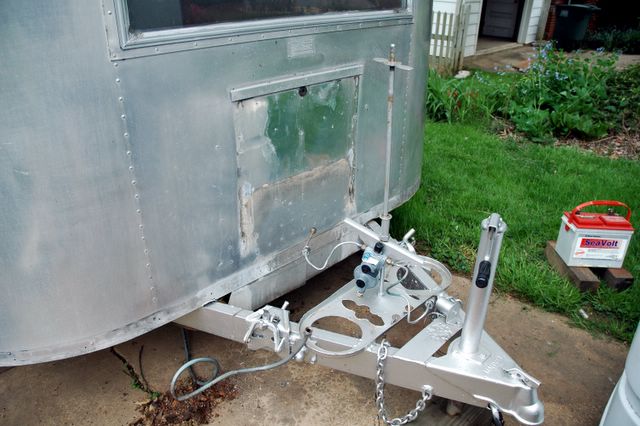
At the rally, I started spreading the word that we would appreciate it if the more technically oriented members could look at our trailer. The biggest question in my mind at that point was why I couldn’t seem to drop the belly pan. Word spread throughout the rally…

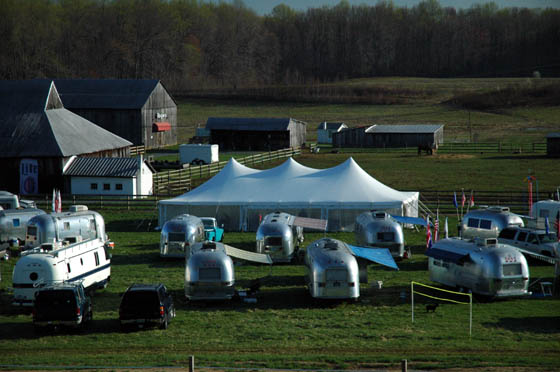
Sunday, apparently someone had the idea that it would be good to have a little workshop about some of the more common problems in older trailers. I recall aiming for the leftover breakfast goodies when someone like Rob Baker grabbed my elbow. I was steered to a place in the meeting tent where Colin Hyde was holding court with a bunch of the more technically minded Airstreamers.


Colin frequently entertains small children with trailer horror stories

Who is Colin Hyde? Tall, quiet and intense, Colin is the kind of guy who spends most of his time studying a situation before acting. Colin’s business is devoted to developing quality renovations to vehicles, particularly Airstreams. I see him now as kind of a Zen master of trailer knowledge. But like Zen student, my mind still had to change to accommodate a better perception of reality.

When I finished explaining my questions to him, I realized I probably said “um” as much as anything of substance. Honestly, when he started asking me questions about my trailer, I got scared! I realized suddenly that he was going to give me the straight story on what was up with our trailer… and that I might not like the answer!

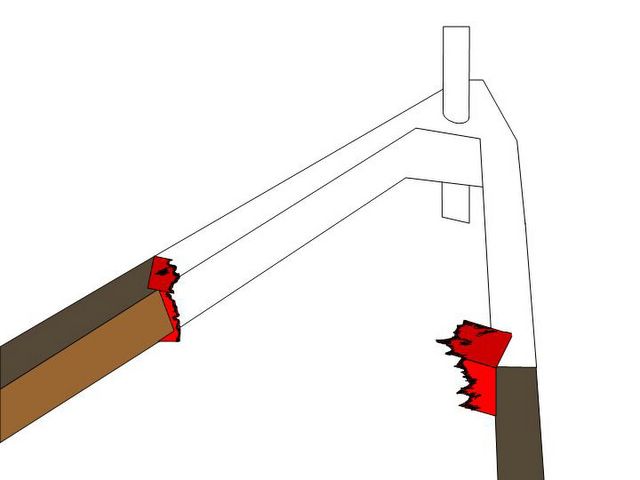
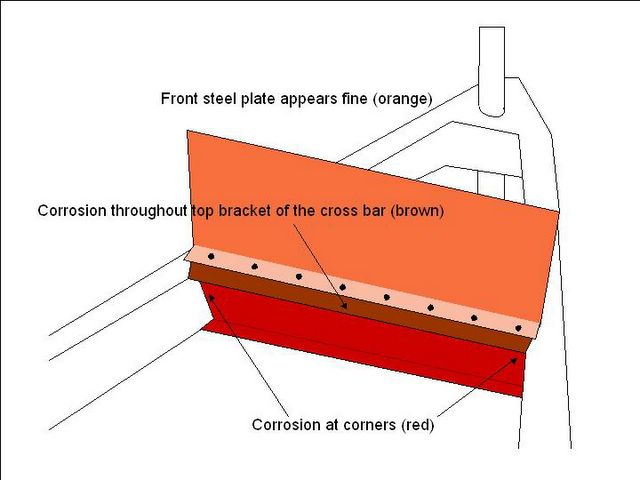
Colin then mentioned that dropping the bellypan might not be such a great idea. Quickly I got lost in a discussion of “U” channels, banana wraps and skins. Sensing my confusion, he grabbed a paper bag and sketched out a slice away view of the trailer wall.

“So, have you jacked her up to check it?”

Slackjawed, I muted shook my head.

“Let me get my jack. I need to look at this.”

I ran to find Rick and get to the trailer. Suddenly all the rally was gathered at my trailer. Colin arrived.

“Oh, look here where you took the banana wrap off. It’s already detatched from the frame. I bet you have popped rivets inside, don’t you?”

“Uh huh.” I looked at Rick with dread.

Colin continued, “Ok, I’m going to crank the jack on the frame and you’ll see that part that’s bent at the frame intersection just lift right up. That’s where it’s come apart.”

At this point I was wondering if we could possibly ever drive this trailer for the 40 minutes ride back to our house without it splitting apart and littering Route 495.

“See, it’s rising here when we put pressure here. Now watch, let’s have some folks come inside and I bet you’ll see it bounce apart from the frame.”


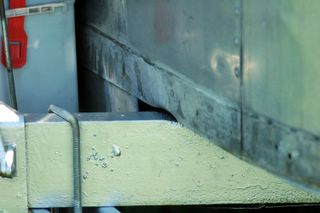
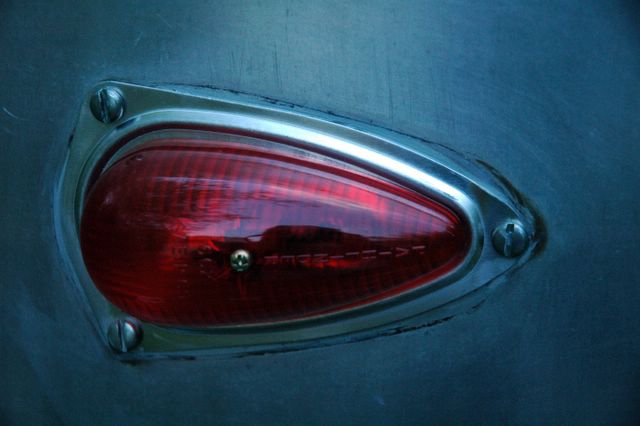
Hidden under the banana wrap, the rising dent showed where the outer skin was bouncing away from the frame

As it jiggled up and down, I continued wondering what kind of fine the police would give me for spewing the wreckage of the trailer on the highway. What would happen to my insurance rating? Would it affect my credit rating as well?


I could only imagine it wrecked

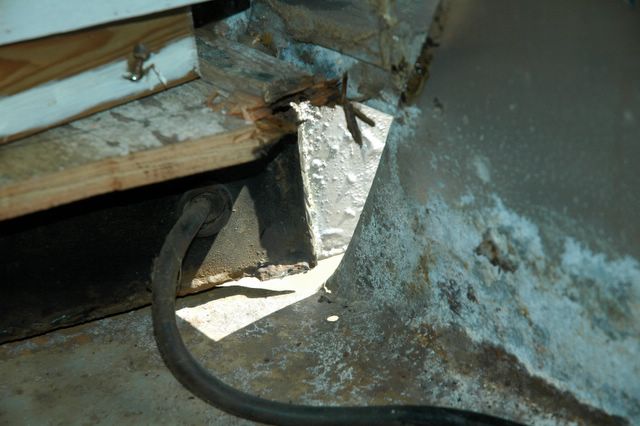
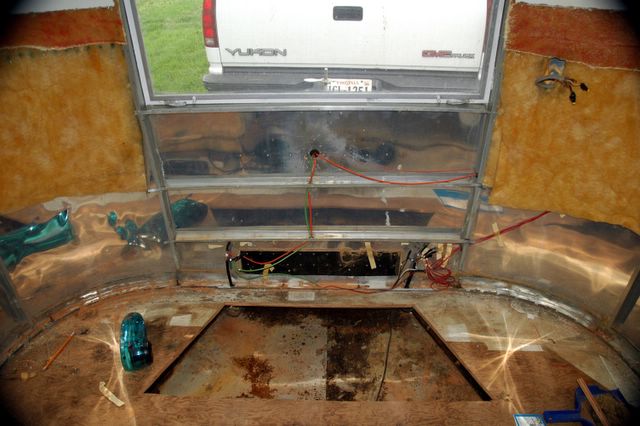
“C’mon Mary, let’s give this trailer the screwdriver test.” Colin brandished a heavy duty screwdriver from his rear pocket like a weapon and started probing it into the flooring “Oh, it’s starting to go in here. Yep, it’s the start of floor rot, front end is in crisis. Mind if I check your back?”

Rick opened the compartment where we keep our hoses. Someone in the crowd laughed “Now Colin’s getting into the real poop!”

I started getting dizzy. Rich Luhr saw me weaving on my feet. “Whoops, Mary, sit down!” I sat. “Count yourself lucky. Colin found much more on my Caravel!”

Oh. I wasn’t sure if that was good news. Colin was still probing away.

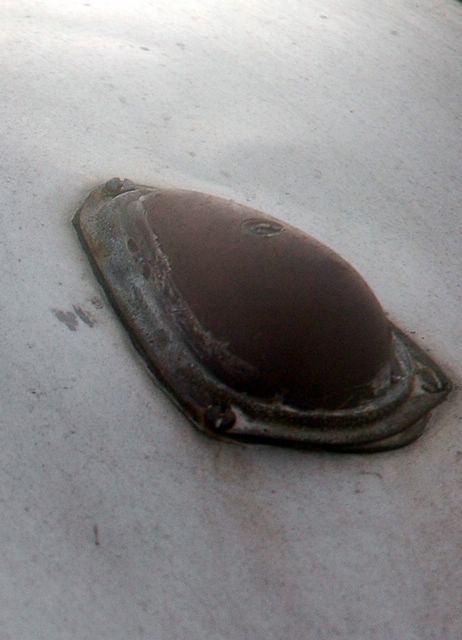
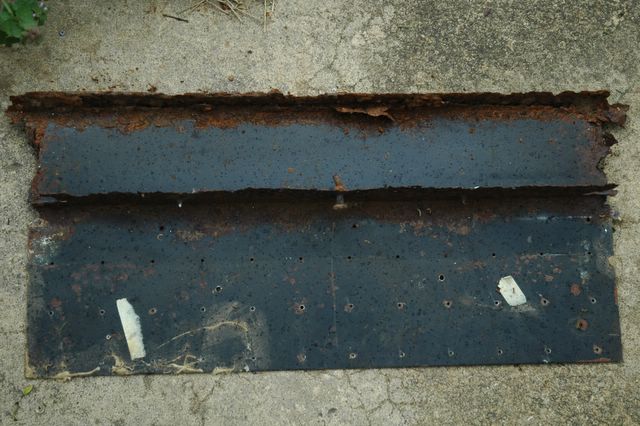
Colin called back “Yes, your rear end is all rotted plywood!” I was feeling very numb and stupid. I didn’t get it all. My mouth was frozen open. I stared at the grass. Rick hung in with Colin and the crowd and sorted details. I started staring at a small bit of aluminum that had long ago been dented at the edge of the bellypan.

“Ooh, that might be an outrigger problem.”

I heard Rich Luhr behind me again. I think he feared that I might be developing suicidal tendencies.

I closed my eyes. Colin saw me “Mary, it isn’t as bad as it all seems. It’s hard, but it’s not as bad as it could be. Just wait, it won’t be as awful as you think.”

Colin laughed when I asked whether to worry about trailer home in one piece. “Of course you will! This problem has been here for years. I can look into fixing it, but my shop is a long ways away. You need to stop right now and think things through.”

Stuart Natoff came up and gave me a hug. “Don’t worry, it will work out.”

I was vaguely aware of one of the ladies (I think it might have been Katrina) from the rally putting a cold beer into my hands. “It will be ok; the guys in the unit will figure it all out.”

I started breathing. I drank a bit of the beer. Rick kissed my forehead. “Honey, why don’t get your mind off this and look at some of the other trailers?”

Wandering, I headed out. Patti Raimondo and Gayle McClelland started to climb up a ladder to the observation deck on top of Clayton Roger’s old mobile police command unit (one of the odder Airstreams at the rally). “C’mon up here, Mary, the view is amazing—and it will make you forget all your bad trailer news!”

I climbed up there with my beer and sat on the platform. Suddenly, the Zen of Airstream repair dawned on me. I suddenly recognized that I’d found some real friends in the WDCU. Yes, the trailer had problems. But more than that, I was loving that moment (so very Zen!), watching the sun reflect of the roofs of all of the trailers and seeing all my WDCU friends from that very high perch.

Everything was going to be okay.


Thursday, April 14, 2005

Signs of Trouble Appear


Who knows how much trouble lie beneath the calm aluminum exterior

At the end of August, 2003, the Toaster—a 1961 Airstream Safari model—joined our family. Ever since Rick and I had met another young couple traveling and working full time from an rv in Utah nearly a decade ago, I have dreamed of hitting the road with total freedom. Getting our Toaster was our first step towards realizing that dream.

Last summer, Rick noticed a panel of the frame beneath the aluminum skin was almost completely rusted away. Closer observation while painting the trailer hitch seemed to indicate that a long ago battery leak had seeped from the front battery box down to the frame. Concerned, we cancelled our planned trip out West. We just didn’t trust that the trailer could take going over the mountains. Friends found this silly—the trailer looked great—and anyways, the previous owners had taken it to Florida the previous winter, hadn’t they?

The frame is the true utility trailer that the rest of our camper is built on. I started researching. First I played—and replayed—the Vintage Airstream Club’s DVD of old Airstream movies, focusing carefully on the scenes showing the old trailer. Eventually I determined that the damaged part we saw was the thin sheet of steel at the front end of the trailer that appeared to mostly serve to hold the skin out. But I did wonder how far the damage went back into the places I couldn’t see…

So, on a fine fall day after consulting with fellow members of my local Vintage Airstream club, the Washington DC Unit (WDCU) of the Wally Byam Airstream Caravan Club International (WBCCI), I decided to drop the aluminum sheathing covering the bottom front end of my trailer. Following the advice of other Airstreamers on the Internet, I attempted this by drilling out the rivets that attached the aluminum trim strip (better known as a banana wrap) that appeared to hold the bottom on to the trailer. At the end of the day, I was dusty and dirty from rolling under the trailer, the banana wrap was off, but the belly pan was firmly attached to the trailer.

Well, at this point I felt I had earned a tiny bit of street cred for removing the rivets, but that darn pan was driving me nuts! So, I called Stuart Natof, a fellow member of WDCU who had completely overhauled a similarly aged Bambi.

“Mary,” he said, “I had that problem too. There’s no way of knowing how high the rivets go to attach that belly pan. Do what I did, just cut it away. If you do it in sections, you can use the holes later as removable access panels.”

That all made sense, but I agonized over cutting into the aluminum. I bought flashing at the hardware store to get a feel for cutting with tin snips—and quickly decided I didn’t have the hand strength for it. A friend who works as a union metal worker suggested using a Sawzall—but the idea of controlling that kind of contraption close to my face and on my back didn’t appeal either. Then I thought of using a Dremel tool or possibly a Rotozip. Before I knew it, it was rally time again…

Cherry Blossom Rally time. This is annual early spring camping gathering that draws vintage airstream enthusiasts from all over the country to the Washington DC area. Fortunately, the Cherry Blossom Rally is only about 30 miles from our house. I pulled out a deep effort on interior finishings to prepare for the rally’s open house. I covered cushions, made drapes (ok, another epic, too), sanded the tub out and refinished the interior wood. After three weeks of effort, the trailer wasn't perfect, but the inside looked pretty nice. Last Thursday we finally got packed up and hit the road in two vehicles.

I followed Rick in a second car, so he could use it to drive back to go to work on the second rally day. All the way over, I was amazed by how much the rear end of the trailer bounced up and down every time we traveled over a rise in the road. Watching the trailer from the other car, I gained a new perspective on the trailer—and it added to my growing sense of dread that something was very wrong inside. “Honey,’ I said to Rick, “the Toaster’s suspension looks bad.”